The North Face of the Middle Teton holds two classic alpine routes in a commanding setting, the North Ridge (5.6, rock) and the Northwest Ice Couloir (5.6, AI2, steep snow). The two can be linked together to form a fusion technical mountaineering route popular with winter climbers. The East Face is one of the Fifty Classic Ski Descents of North America and was my choice of retreat from the summit.
(All photos shot on a Samsung S20 – big camera should be fixed soon!)

Intro
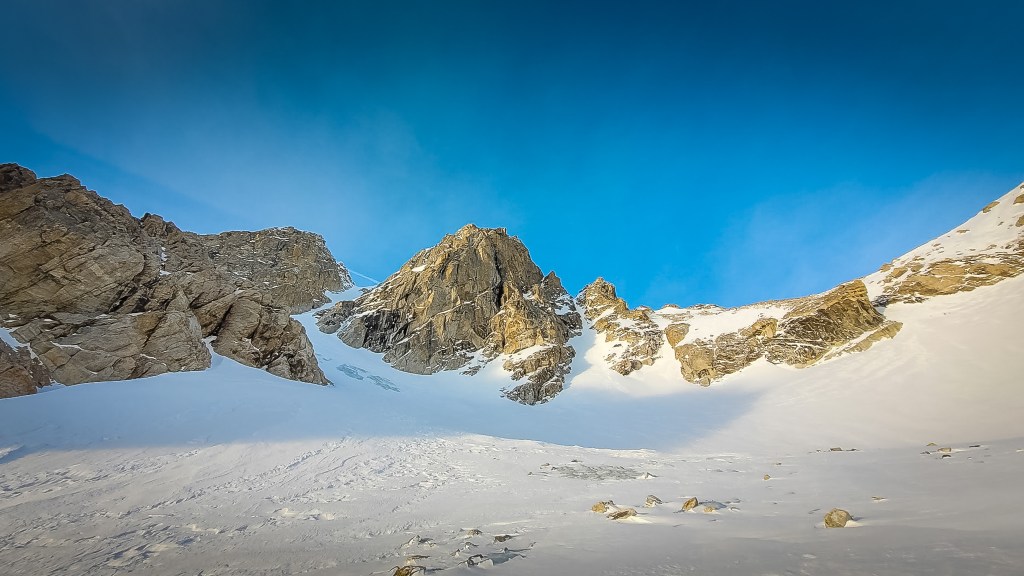
The northern aspect of the Middle Teton is a wild place. The North Ridge, one of the range’s premier technical scrambles, provides passage from the Lower Saddle (11,600 feet, separating the Grand and Middle Tetons), through 1,200 vertical feet of broken rock, slabs and chimneys, to the 12,809 foot Middle Teton summit. Though rated 5.6, the North Ridge is more of a fourth class mountaineering ramble studded with a few short but highly exposed cruxes. West of the ridge lies the Northwest Ice Couloir (NWIC), a striking 60-70 degree freeze-glued choss gully home to a permanent strip of alpine ice (AI2, 5.6) typically climbed in summer. Below the technical ice lies a rocky waterfall ready to mercilessly swallow any slip. In winter the upper half of the NWIC chocks with snow, allowing North Ridge climbers to traverse off rock at the “Black Chimney”, approximately 12,400 feet, and finish on a steep snow climb to the summit. Conveniently, this bailout occurs right before the crux pitch of the North Ridge. Linking the lower Ridge to the upper NWIC, following the path of least resistance, is the preferred path of ascent for winter climbers looking to maximize efficiency and minimize difficulty, perhaps 5.5, M3, Steep Snow?
Love Ten Thousand Too Far? Support independent mountain journalism with $5.10 per month through Patreon (and receive extra bonus content), or with a one-time donation. Any and all support is greatly appreciated.
Approach
Two thick slices of homemade sourdough bread (courtesy of my talented girlfriend), toasted, with almond butter and sliced banana. One grapefruit. One cooked red beet. 12 ounces of black coffee to combat the negative 22 degree morning. That’s right, negative 22 degrees. I find it very hard to motivate when my nostrils freeze upon opening the car door, especially after waking at 3:00AM. I sat lazily in the Bradley-Taggart lot contemplating how much I valued my toes. I hadn’t ventured in the park since skiing the Grand Teton eleven days earlier, and it hadn’t snowed but six inches in three weeks. I was so certain of a bulletproof snowpack I removed my avalanche shovel and probe from my pack – deadweight. Then there was good ol’ COVID 19. I recently caught my first case despite two vaccines and two years of dodging the beast. Sunday marked my fifth day of quarantine. After a miraculous Saturday recovery and a nervous undercurrent from four days of Netflix, carrot cake, soy-milk ice cream and negligible physical activity, I was primed to explode. Given the high likelihood of heinous snow, I made climbing the star of the day. I’d been pondering soloing the North Ridge for some time, and today just felt a special sort of right. I was supposed to climb this route last season with Carl Osterburg – I felt guilty for leaving him behind – but he was out of town, I was impatient and figured I could do the route-finding dirty work to make our tandem return that much more efficient. With two ice tools, a pair of crampons, harness, ice screw, bail cord and a 30 meter rope I set off into the dark as a party of one.
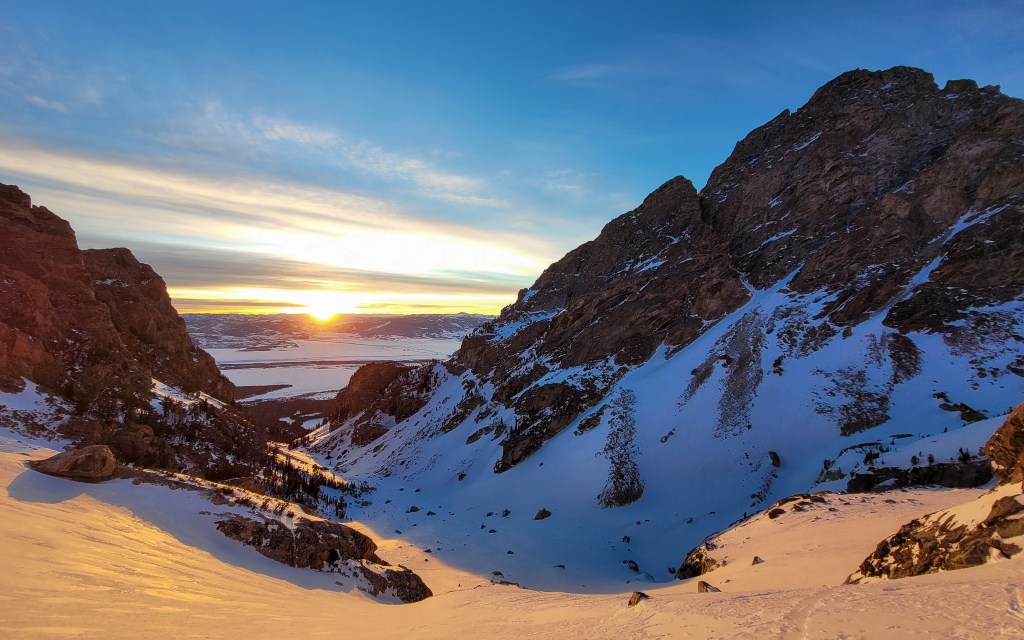
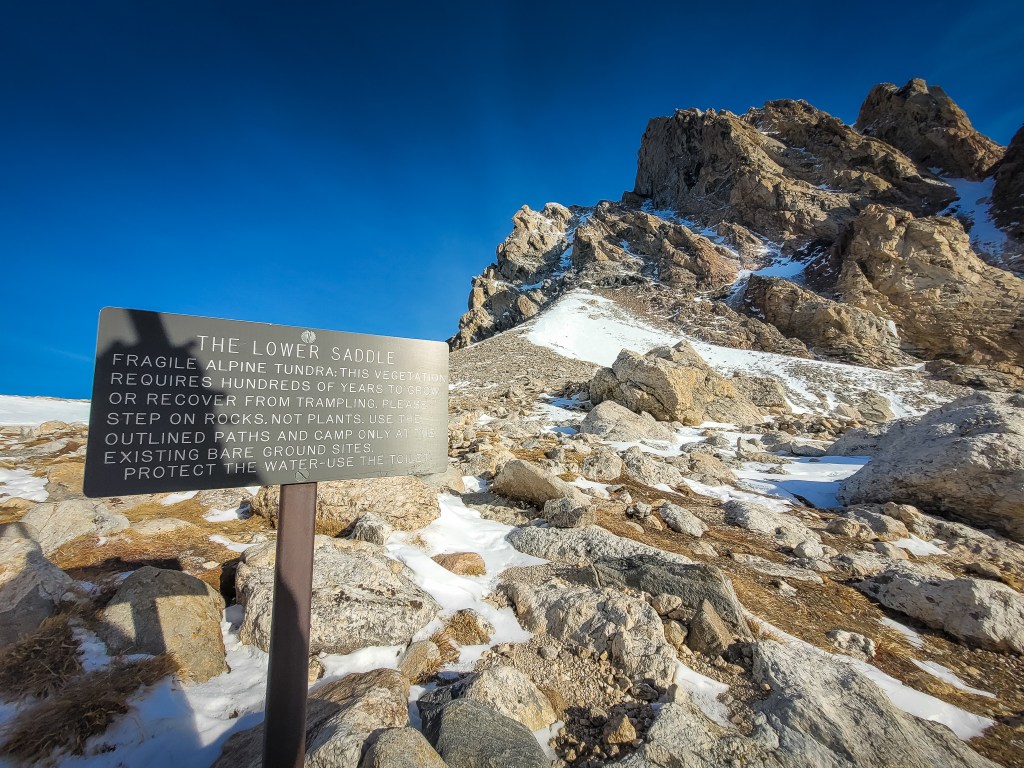
I always remember the approach to Garnet Canyon’s North Fork easier than it is. I clocked two hours to the Meadows and began switchbacking with ski crampons up the steep headwalls adjacent to Spalding Falls. COVID had my number today. My legs felt heavy, brain foggy and aerobic capacity clipped. I adjusted pace and mindset accordingly. By 9:30 I was changing into climbing equipment at the lower saddle, admiring views of the Middle’s North Ridge and the southern aspect of the Grand Teton. Little did I know I’d already made my first route finding mistake of the day.
Unbeknownst to me, a popular winter variation to the standard North Ridge ascends a steep snow couloir to the looker’s left side of Pinnochio Pinnacle, short-cutting the first 500 feet of tedious, low angle, crampon dulling shenanigans on the North Ridge. For reference, Bonnie and Pinnochio Pinnacles are the two obvious high-point rock features at the base of the North Ridge, listed north to south. I obliviously followed the summer route, adding many steps and taxing time to my already slow outing. Easy alpine wandering west of Bonnie Pinnacle – climb steeper slabs (5.2) to gain the notch between Bonnie and Pinnochio – traverse and down climb a very steep, exposed and hanging snow ramp ending in an awkward rock chimney (low fifth, scary) on the west side of Pinnochio to the saddle separating the pinnacles from the North Ridge, a rappel here could’ve been handy but I didn’t see any gear. Trails of past climbers on the winter shortcut joined me at this point. I smiled and shook my head – I just can’t seem to do anything the easy way lately.


The North Ridge
Take One – Drytool Slabadelic
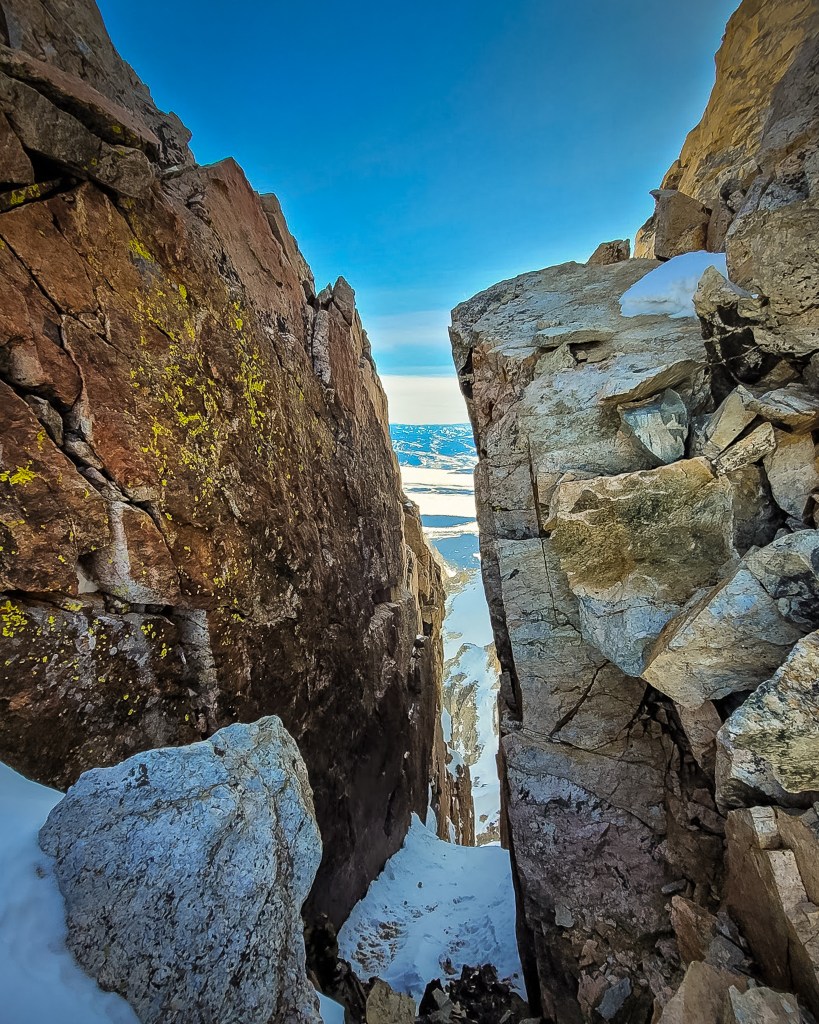
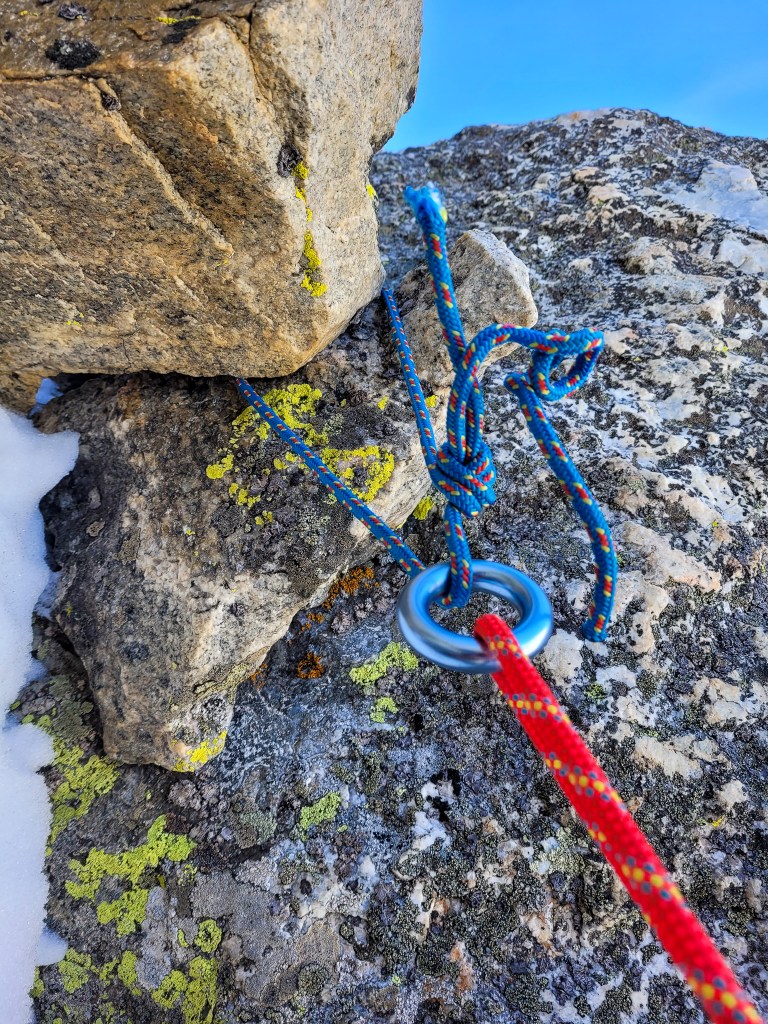
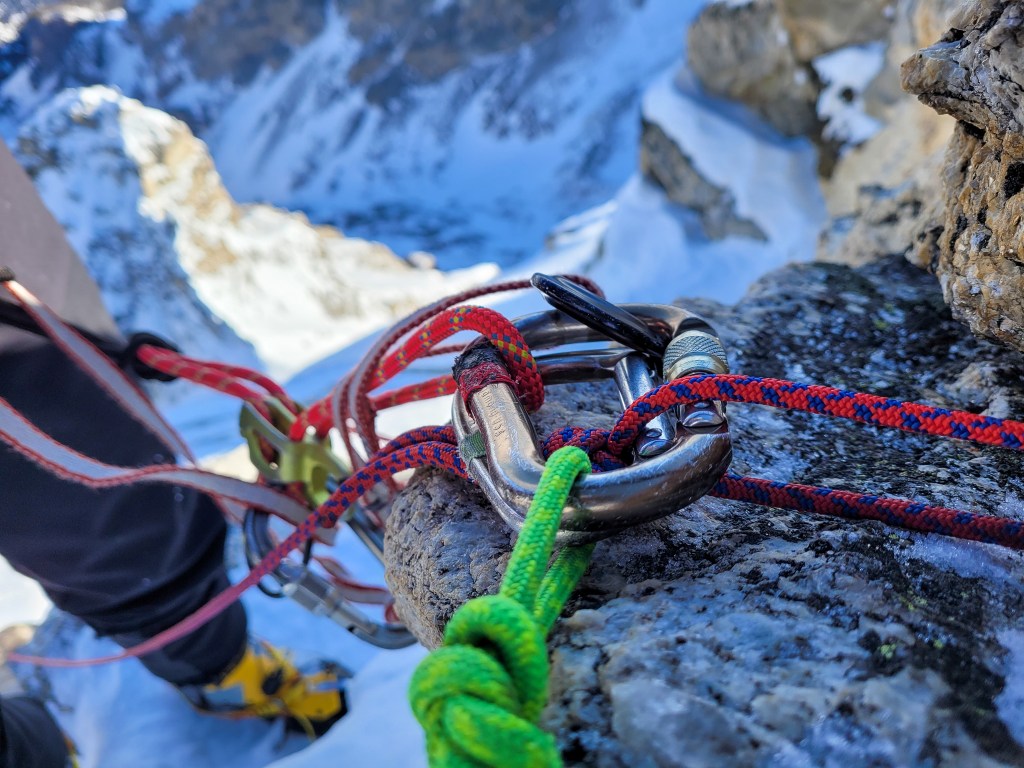
I naively began up the North Ridge following the path of least resistance. According to the “Teton Rock Climbs” guidebook(1), the original “more difficult” route of first ascent climbs a slabby and exposed ramp network on the ridge proper, past an alcove called “The Room” and traverses west. “An easier and less aesthetic” alternative beelines west directly from the notch on more benign but equally exposed ledges. Intrigued by The Room I started up the more difficult variation, scratching and hooking my way up the exposed slabs with tremendous care. This was no place to fall. Though reasonably comfortable I had an eerie feeling I was pushing my luck. If there hadn’t been a rope in my pack and a harness on my waist I would have long turned around, for I was far past the point of down climbing. About 50 feet ahead I spotted a chockstone fit for rappel, climbed through even thinner mono-point terrain and tied off to the stone for a break. Hanging from a diaper of dyneema I peered over the ridge and eyed my path ahead – no bueno. The climbing was too steep and exposed for my rope-less winter comfort. Kicking myself for not taking the easier route and wasting at least an hour, I pulled out a loop of emergency cord and made three 15 meter rappels off natural anchors to the Pinnacles/North Ridge saddle. Hopefully I’ll be first on route this summer with a pocket knife before the 2022 EXUM crew can shame me out of town.

Take Two – An Easier, Softer Way
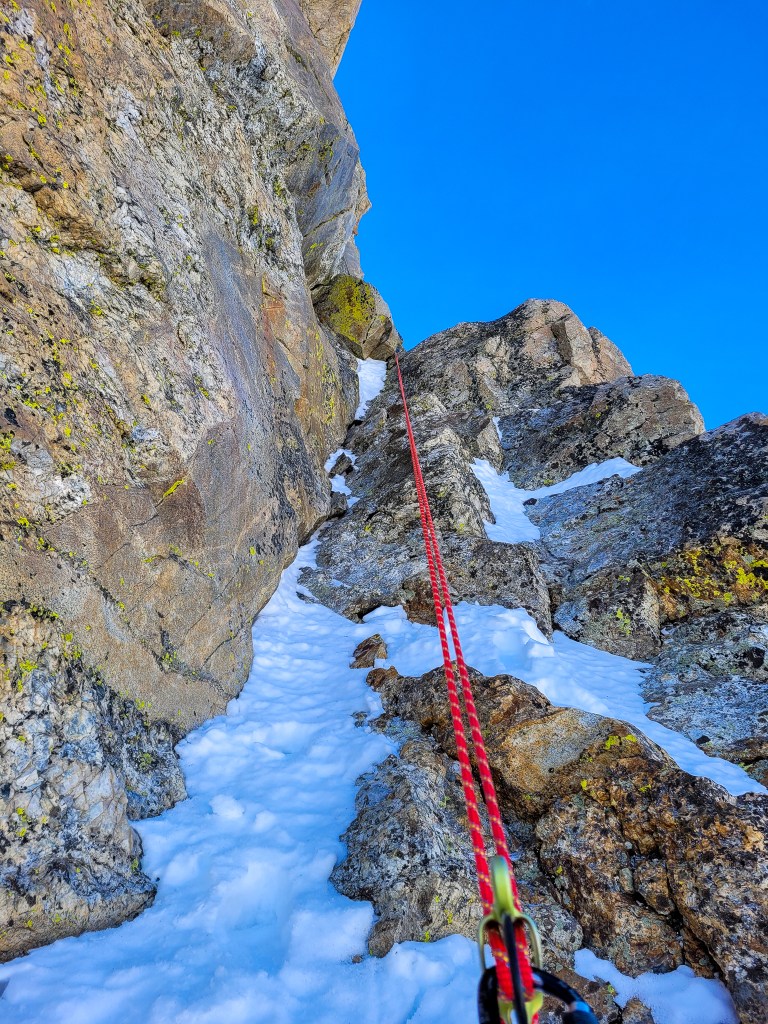
When I began rigging anchors to bail, I had no intention of trying the ridge a second time. On my last rappel I spotted the obvious “easier” traverse to the west. Under the guise of “just checking it out” I pulled the rope and began investigating. An easy fourth class traverse clearly beaten by summer foot traffic provided care-free access to the broken northwest face and ice couloir. I felt like a dummy. I rambled up the snow dusted slabs for a few hundred feet and reached a steeper section of technical chimneys. The crux was an awkward 20 foot stem chimney leading to a chockstone with poor footholds (5.5, M3). I got two great tool hooks and smeared my mono-points up dime sized edges to gain the ledge above. Even though some moves were at my winter limit, good rests before and after allowed me to compartmentalize each body motion, down-climb if needed and continue only when confident. I reached a trance-like state, moving slowly but fluidly, feeling each hold intimately and becoming one with the mountain. Despite thousands of feet of exposure and being completely alone, I was right at home, exactly how you want to feel when alone on a big alpine face.
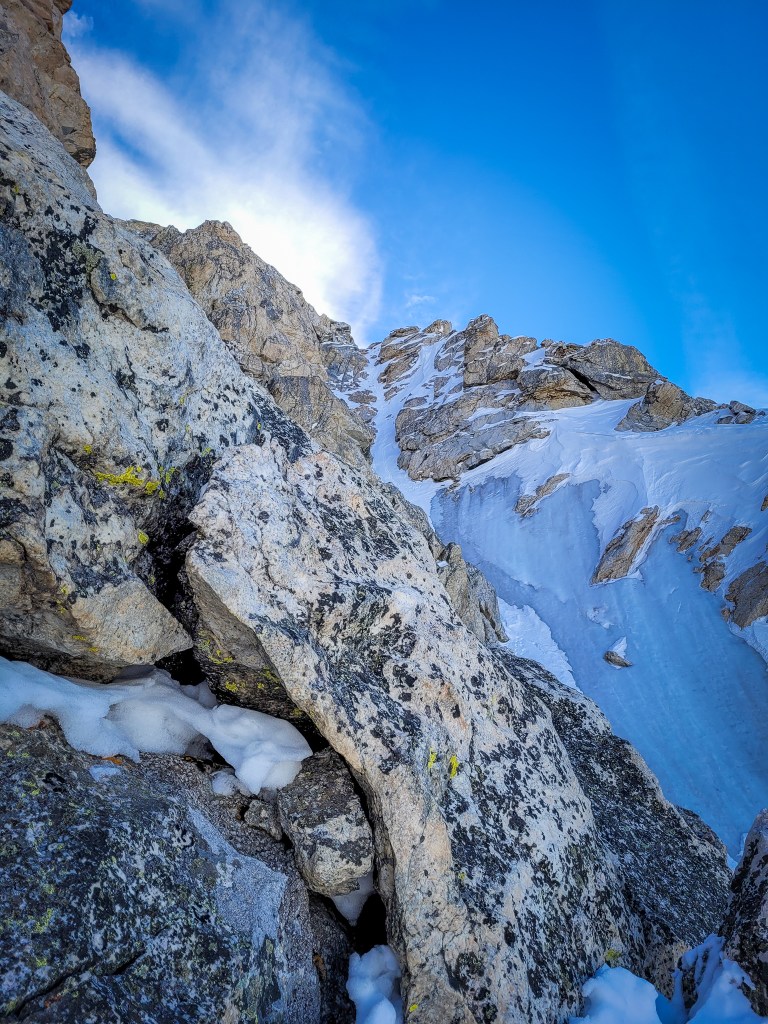
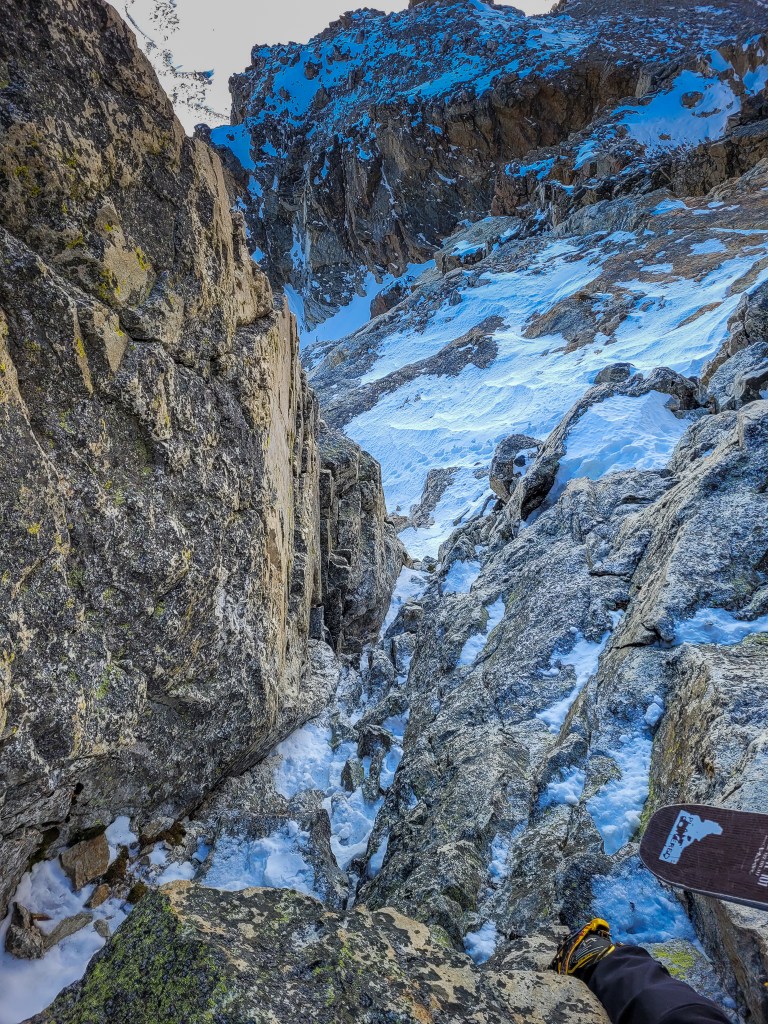
The NW Ice Couloir – No Ice
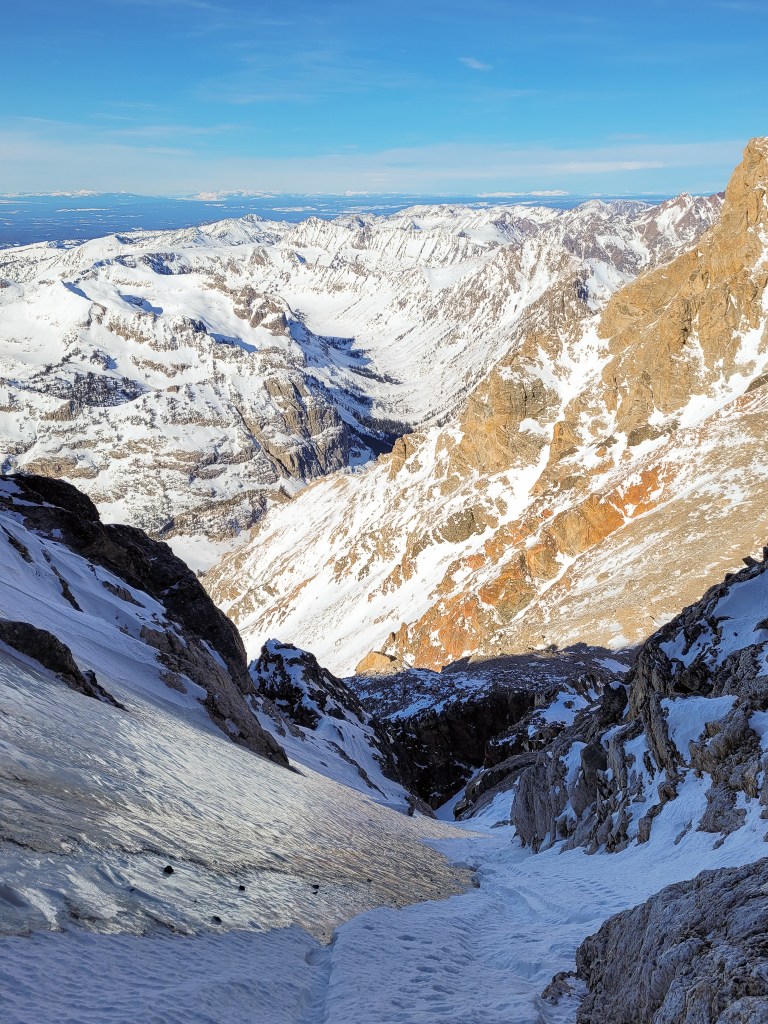
I was overjoyed to reach the Black Chimney and see an easy down-climb into the Northwest Ice Couloir. I was having loads of fun on the ridge, but dry-tooling around on insecure slabs was beginning to get old. Daylight was also fading and I was short on calories. In typical winter fashion the upper NWIC was chocked with enough snow for steep boot-packing. Though I was prepared to climb ice I wasn’t disappointed with an easier medium. Steep snow is my jam, and following the trails of a previous pair I blasted up the final 400 feet in a fury. A wall of thick alpine ice on my right was beautiful, elevating an already epic scene to National Geographic status. I yearned for my proper camera. I will be looking forward to returning here in the summer, to climb the full entirety of this truly stunning ice couloir. I reached the summit at 2:00PM beneath a dazzling bluebird sky, showered by gorgeous views and endless sunshine.

The East Face – 5.12 Side Slipping
Heinous doesn’t do the agony I suffered on the East Face justice – one of those, “it should have been better” moments, taken to the tenth exponent. My original plan was to descend the Southwest Couloir in hopes of sun softened bliss, but significant down-climbing through a thin upper couloir rustled my lazy side. Instead, rappel anchors lured me onto the steep and exposed East Face. I had my doubts, but a few ski tracks tricked me towards hoping for soft snow. I couldn’t have been more wrong. Wind-buffed breakable crust on an exposed 50 degree headwall kept my axe in hand for an almost entirely side-slipped descent. I made a half dozen turns, each one erratic, punchy and scary. Instead of having fun I settled on avoiding death, and carefully spent over an hour strategically surviving the iconic Teton face (a trip report of the East Face in good conditions can be found here). My biggest accomplishments on the descent were keeping a cool head, resisting impatience and back-pocketing the nasty ego that wanted so desperately to make a turn. I would have been angry had the climbing not been so spectacular, or had I not predicted worthless snow. Sometimes a little bit of type three fun is par for the course when ski mountaineering. 13 hours car-to-car was more than I intended to chew, and by the time I reached my cozy Victor, Idaho home I was ready to plow a three egg kale and cheddar omelet, a pile of millet and pinto beans, a whole yellow bell pepper and fuji apple, two slices of birthday carrot cake and a half pint of soy milk ice cream – and that’s exactly what I did.

Extra – To Carry Gear When Soloing?
To many soloists, carrying a rope, harness and anchor materials would dilute their experience. Some, like the late Marc-Andre LeClerc, wouldn’t even bring an emergency GPS device. To pre-qualify, I wouldn’t call myself a soloist, but I occasionally end up alone on big mountains. When planning a solo adventure, there are pros and cons to leaving the gear at home, and for me the deciding factor is confidence. The two questions I ask myself are:
- How confident am I of my ability to climb ropeless at the given difficulty of the route?
- How confident am I that I will be able to stay on route?
On a route I know well with climbing far below my limit, like the Grand Teton’s Owen-Spalding Route, I roll with tennis shoes and a running vest. I am 100% confident in my ability to ascend and descend the route in any condition. Should only one of the answers to the above questions be a resounding “very confident!” I will usually bring a short rope, harness and some spare gear to bail, like a half dozen medium-small stoppers, an ice screw and/or some pitons, and thirty feet of webbing. Should both answers be wishy-washy, I heavily consider recreating elsewhere.
Traveling with a rope and bail gear introduces a different mindset to solo climbing that can be both positive and negative. When climbing the North Ridge, knowing I had means of retreat, I climbed several sections of rock I wouldn’t be comfortable down-climbing. A rope introduced the confidence I needed to route find ad libitum without knowing what was around every corner. The downside of carrying a rope is a heavier load and the potential for false confidence – there might not always be somewhere to build an anchor! When forging into difficult terrain alone I am very aware of my surroundings. If something goes wrong, if the climbing gets too difficult, is there a way out?
Forgoing the emergency gear introduces a soberingly black-and-white approach to solo climbing. The question before leaving the ground is very clear, you can either do it, or you can’t. Failure to nail this question results in getting trapped and requiring an expensive rescue if you’re lucky, but more often severe injury or death. This strict binary equation could be perceived as a negative, but at least the climber and the danger are on crystal clear terms. Other benefits to leaving to rope at home include a lighter pack for both the approach and the climbing, which can aid in safety by reducing overall fatigue and consequentially improving climbing performance.
Ultimately, the golden rule of solo climbing is “don’t climb up what you can’t climb down.” Adding the potential for rope-assisted escape introduces wiggle-room to this golden rule, but the benefits of a rope shouldn’t be over conflated. Nothing about solo climbing, or climbing at all, is safe. No matter if there’s a rope on one’s back or tied to one’s harness, self awareness is paramount. My number one goal when climbing in the mountains is to return home alive, to my girlfriend and the family that loves me. I will do everything in my power to increase those odds, even if it involves bringing a little extra gear, or waiting an extra season until the time is right.
The Numbers
For the skiers and climbers out there…
- Round Trip Mileage: 13-15 miles (+/- 2 miles)
- Round Trip Time: Less than me
- Total Vertical Gain/Loss: 6000-6500 feet
- Technical Route Vertical Gain/Loss: 1,200 feet
- Approach: Bradley/Taggart Trailhead/North Fork Garnet Canyon
- Recommended Gear:
- Ice Tools
- Crampons
- 30 meter rope (if skiing East Face in low snow/early season)
***note: rappel is exactly 15 meters from lowest anchor only! If uncomfortable down-climbing make two rappels or bring a longer rope
- Recommend Guidebooks
- “Teton Rock Climbs” – Aaron Gams
Sources
- “Teton Rock Climbs” – Aaron Gams (guidebook, 2012)
As always, I would like to give a huge thank you to my supporters, Icelantic Skis and Chasing Paradise, purveyors of great skis and delicious locally sourced food, including my favorite whole-food “Rob’s Bars” and craft mead.
If you enjoy and would like to support Ten Thousand Too Far, consider subscribing below and/or leaving a donation here. The hours spent writing these blogs is fueled solely and happily by passion, but if you use this site to plan or inspire your own epic adventure, consider kicking in. A couple bucks goes a long way in the cold world of adventure blogging. I also love to hear your thoughts, so don’t leave without dropping a comment! Thanks for the love ❤️
Follow along on instagram at @brandon.wanthal.photography